
Meeting Summary Assistant
What: Meeting Summary Assistant allows the user to live transcribe and use to summarize a meeting transcript, summarize attachments, or summarize text to put in your Appointment Summary Report or Notes.
Where: Meeting Summary Assistant is available when creating an Appointment Summary Report or a Note for a student when the feature is active for your institution.
Who: The Meeting Summary Assistant is available to faculty and staff who have been granted this privilege. It can be used to summarize meetings and document notes for students assigned to their access.
Feature Overview
The Meeting Summary Assistant allows the staff to transcribe and summarize audio from a meeting, summarize attachments, or summarize text to put in your Appointment Summary Report or Notes.
Important. No audio is recorded or stored by Navigate or our third-party transcription service. The Meeting Summary Assistant uses live transcription that generates a transcript that is temporarily available on the Appointment Summary Report. Navigate also does not store your transcription after the Appointment Summary Report is saved or closed and neither does our third party transcription service.
Using Meeting Summary Assistant
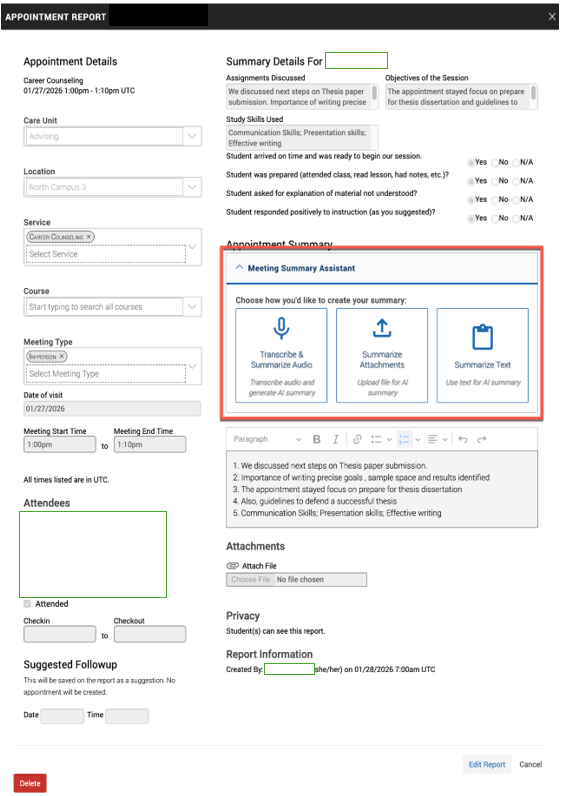
Meeting Summary Assistant will appear at the top of the Appointment Summary and Note text fields.
In an Appointment Summary Report: (Student name and appointment details are fictional and for demonstration purposes only.)
In a Note: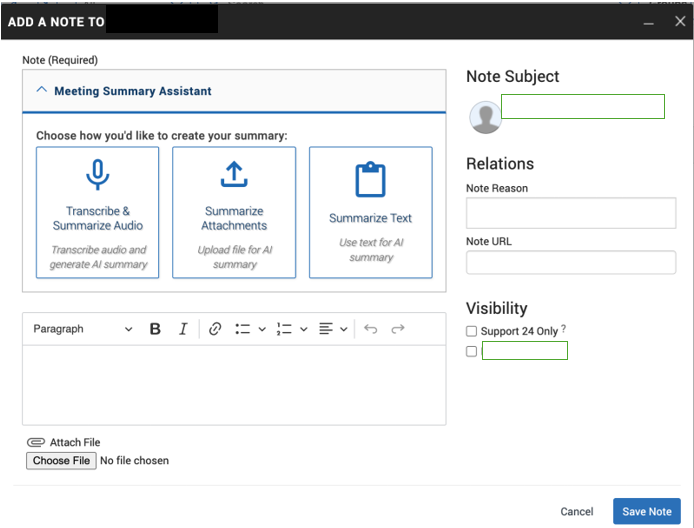
There are three ways to add content to the Meeting Summary Assistant:
- audio transcription and summarization
- attachment summaries
- or text summary.
The user selects one to start creating a summary for the appointment and content is updated in the summary text box field on the Appointment Summary Report or Note. The user can use more than one option, which is added to the existing summary. For example, the staff member can create an audio transcript, upload a document, and add the summary to the transcript. Staff can edit the summary before saving the Note/Appointment Summary.
Transcribing Live Audio
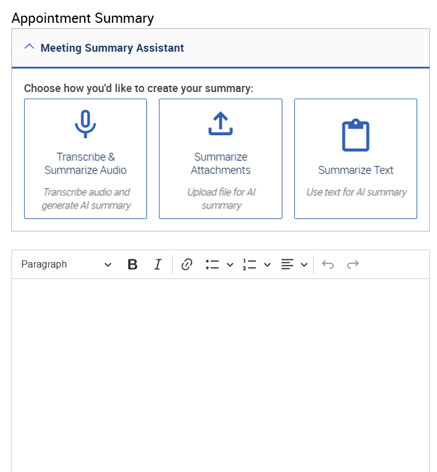
To transcribe live audio, users select Start Transcription from the available options.
In an Appointment Summary:
In a Note: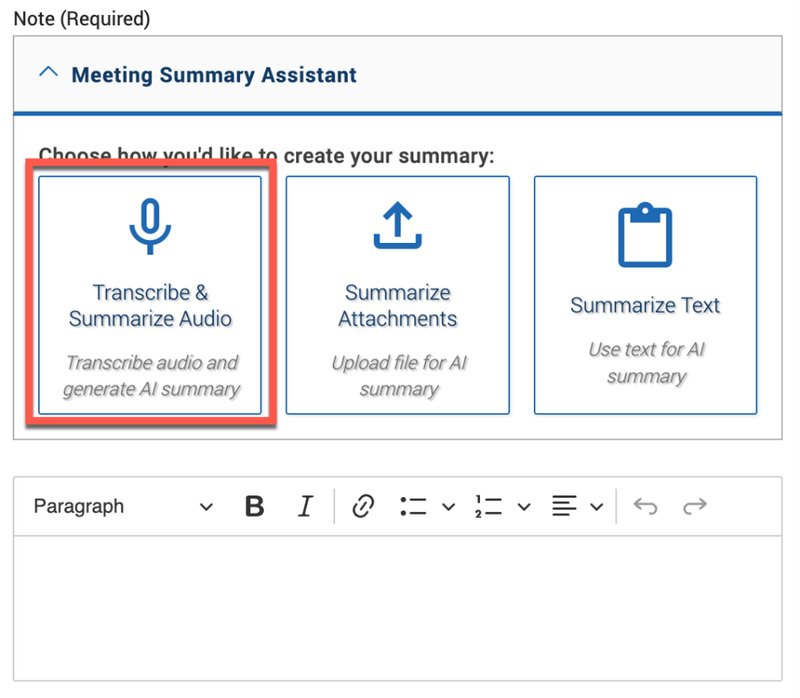
Once the Transcribe & Summarize Audio option is chosen, the user needs to provide consent for recording before proceeding by reading the warning and selecting Yes. The live audio transcription then begins. **Do not close your laptop, or the transcription process will end immediately.
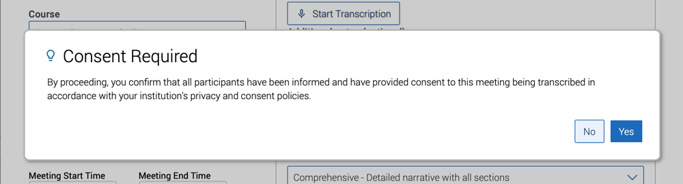
This transcript can be paused and restarted during the conversation. Note that the staff user will also see the transcript "live" as the conversation occurs.
If there are multiple individuals in the meeting:
- Speakers/Staff identify themselves in the beginning of the conversation for optimal live transcription.
- Transcription is also supported for one speaker if, for example, a staff would like to dictate appointment notes following an interaction.
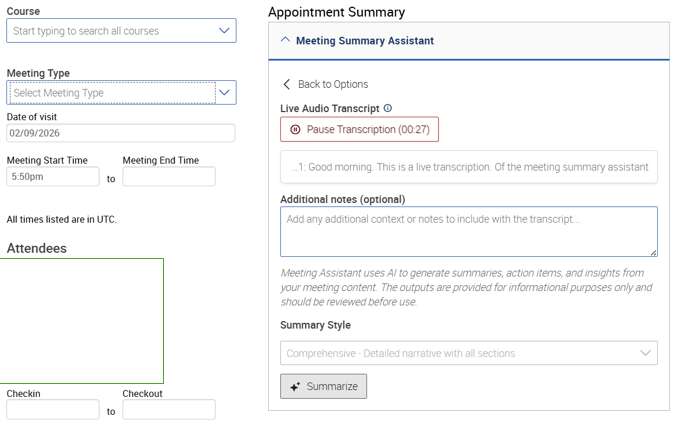
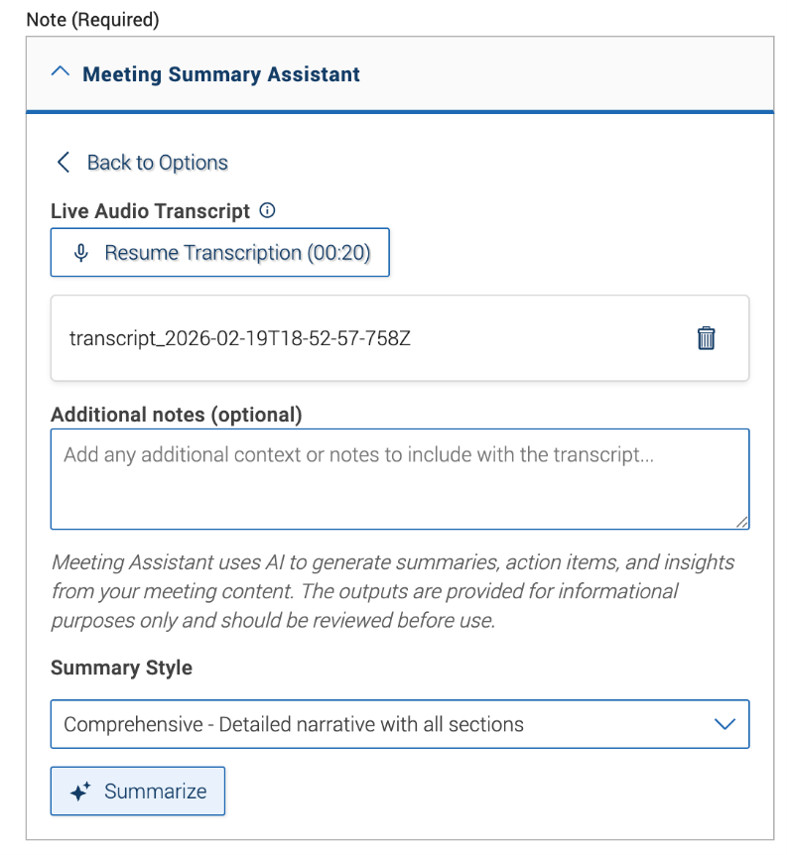
After the conversation is finished, the transcription is stopped. If desired, the transcript can be deleted before summarization, both when paused and once finished.
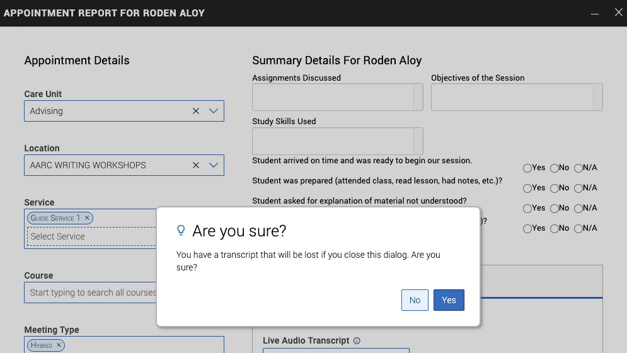
If an in-progress Note or Appointment Summary Report is paused and the user tries to close or minimize it, the transcript will be lost.
Users might choose to summarize the audio transcript before closing. Appointment Summary Reports cannot be minimized while a live transcript is in progress, only when paused or ended.
The staff user can select one of four Summary Styles (or a custom style) and select Summarize. Users can also add additional notes or context that may not have been discussed in the live transcriptions that will be included in the summarization.
Live transcription has a maximum of 90 minutes. If you reach the end of 90 minutes, summarize the transcription, remove the file, and resume a second live transcription on the report.
Important. The appointment summary cannot be closed, minimized, or saved until the audio transcription is stopped.
Summarizing Text
In the next example, we show summarizing text. Users might use this to paste in notes taken separately.
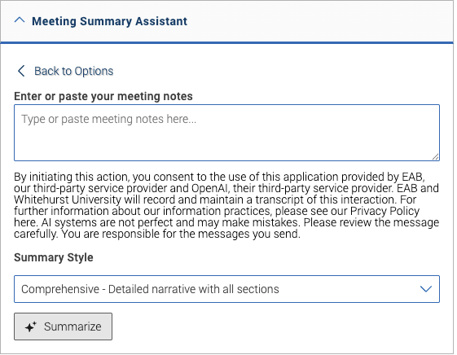
There are four options for the Summary Style, along with Custom Summarization. Custom Summarization Instructions allows the staff user to create their own summary style and apply it to the text, transcript, or upload.
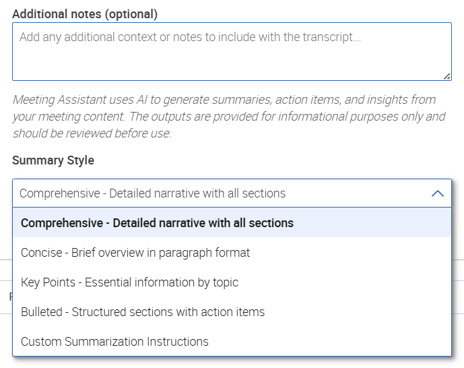
The Comprehensive style provides the most detailed and lengthiest summary, while the Bulleted style offers a concise, focused summary that highlights the key discussion points and details.
Summarizing Attachments
Users can also upload attachments to create an automatic summary, as shown in the example of summarizing an attachment below. This can help extract information from an attachment to add to Appointment Summary Report notes or can process an uploaded transcript file from a virtual meeting platform like Zoom.
Note. Supported file types are txt, docx, pdf, md with a max size of 1.0 MB.
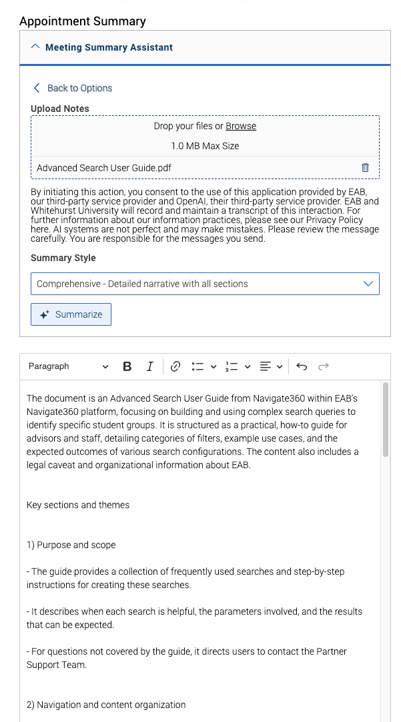
If a staff member uses more than one of Meeting Summary Assistant's options, e.g. transcribing audio and then uploading a document, these will both be added to the summary. The document summary will not overwrite the summarized transcript and vice versa.
Staff users can review and edit the output of Meeting Summary Assistant before saving and filing the Appointment Summary report or Note as they would before. It is recommended that staff always review summary texts created before saving.
What if you've already saved the report and you need to edit it?
You can edit an existing Appointment Summary Report:
- Open the student's profile.
- Locate the appointment summary in the student's history.
- Open the report.
- Select Edit at the bottom right.
- Make your corrections and save the report again.
Meeting Summaries in Student Success
After an Appointment Summary Report is filed or a Note is saved, it is connected to the profile of the student the note/appointment summary was about. In the first example, the Meeting Summary Assistant summary of a sample document shows in the Student Profile History tab.
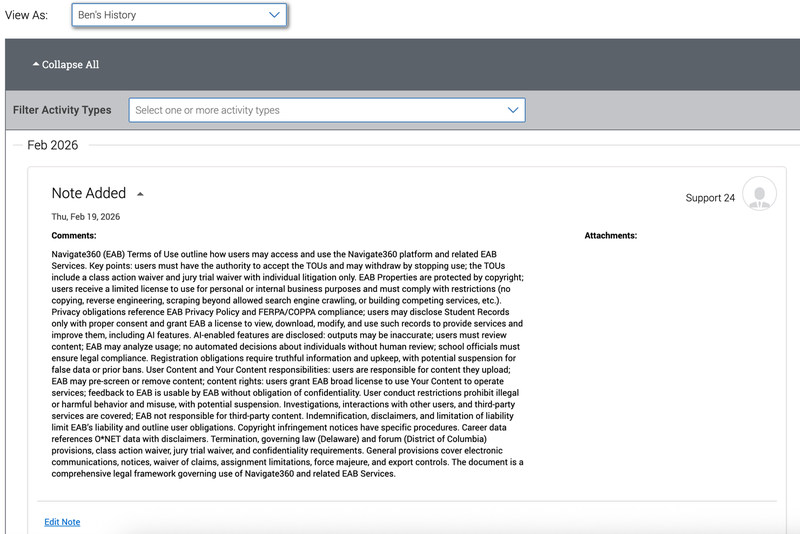
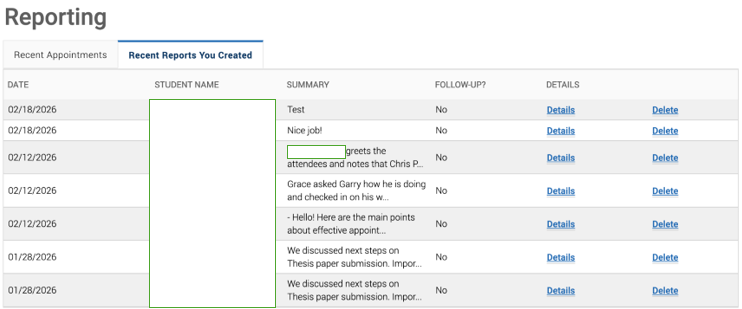
Staff may also view Appointment Summaries on a student on the Staff Home page; for example, by opening a report in the Recent Reports You Created tab.
Improving the Live Transcription Experience
Here are some suggestions if Meeting Summary Assistant is not capturing audio in the way you expect:
- Live transcription uses your microphone to capture audio. Make sure you approve microphone use in your browser when starting transcription.
- Use the live transcription to verify your spoken words are being picked up by the microphone. Not seeing what you expect? Verify you've selected the correct microphone.
- If you're using a headset during a virtual meeting like Zoom or Teams and find that spoken words aren't picked up by the microphone, upload the transcript file output from that meeting as an attachment to Meeting Summary Assistant instead. Supported file types are docs, txt, pdf, and md with a max size of 1.0 MB