
Navigate Reports by Majors/Minors
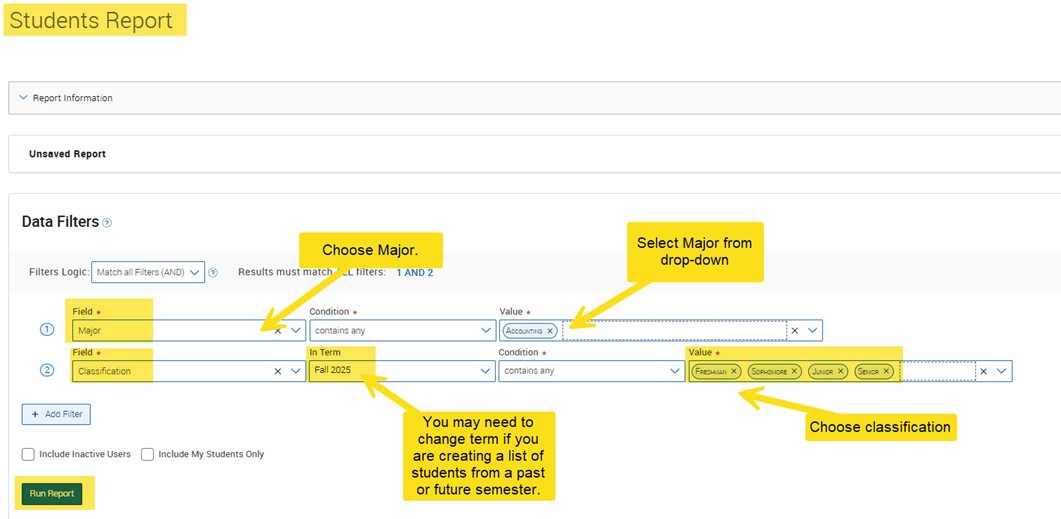
By Major:
Please note: If you need to create a student list by concentration, please use the following Non-Navigate report: SAS dashboards through IR, specifically the Term Activated Student report.
For all other student list by Major, follow the steps below.
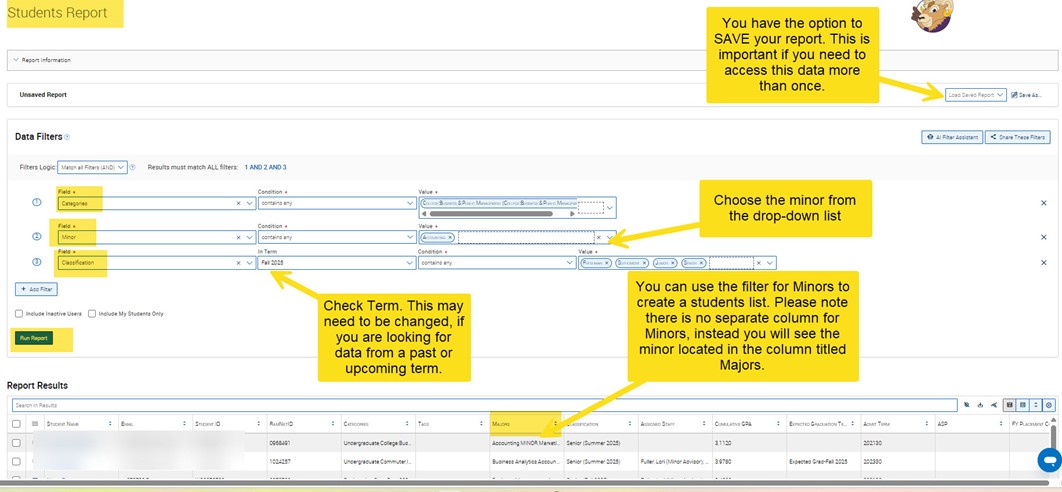
By Minor:
*** Note: Minors can only be found in the Navigate Reports. It is no longer an option in the Advanced Search.
Step 5: Run the Report
- Check your parameters and then click Run Report.
- Wait a few moments while the system processes your request.
Step 6: Review the Report
Step 6: Review the Report
- Once the report is generated, review the list of students. You will see their names and the information based on the filters you applied.
- If needed, adjust the filters by returning to the report setup and modifying any criteria.
Creating a student List by Minor
Creating a student List by Minor
Step 8: Export the Report (Optional)
- If you need to share the report or analyze it further, you can export the data.

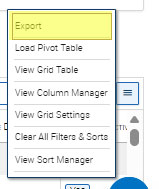
- Click the "hamburger button" at the end of the report (right side) and scroll to Export.
- Choose the file type for your export.
Step 9: Save the Report (Optional)
- If you will need this report in the future, click Save As at the top of the page.
- Provide a descriptive name for the report, such as "[Term]" Student below 2.0 GPA in [College] – to make it easy to find later.
- Saved reports can be accessed under the MySaved Reports section in the Reporting tab.
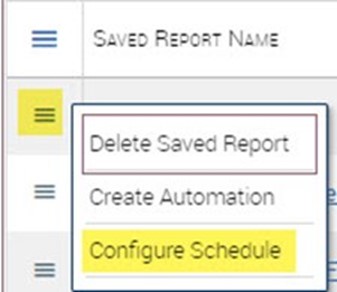
Step 10: Schedule a Report (Optional)
- If you need this report to run regularly, you can schedule it by selecting the report
and scrolling to Configure Schedule.
- Set the frequency (e.g., daily, weekly, monthly), start/end date, and time.
- Save the schedule and Navigate will automatically generate and send the report to your WCU Inbox at your chosen intervals.